So you’ve been asked to add the standard company signature to your Outlook based emails and you’re starting from an HTML file you’ve just been sent. Except in Outlook, there is no way to simply upload an HTML file…
We’ve got your back.
Installing your email signature file in Outlook
Here is our super-simple, step-by-step guide to setting up your new signature in Outlook:
- Open File Explorer
- Navigate to Users /[Your User Name]/AppData/Roaming/Microsoft/Signatures ( AppData is a hidden folder in windows if you don’t see this folder you can put the following into the address(/AppData/Roaming/Microsoft/Signatures) and it will take you to the folder. Or you can turn on the hidden folder by going to the option “View” in the ribbon it’s the last option and then select “Hidden items” See screenshot below

- Add your HTML signature file into this folder.
- Open Outlook. n.b. If you already have Outlook open you may need to close and reopen it.
- Select “New Email”
- In the ribbon is a section called “Include” select “Signature” Your signature will now be in the list to use for signatures.
- Select the signature and your signature will now appear in the email panel.
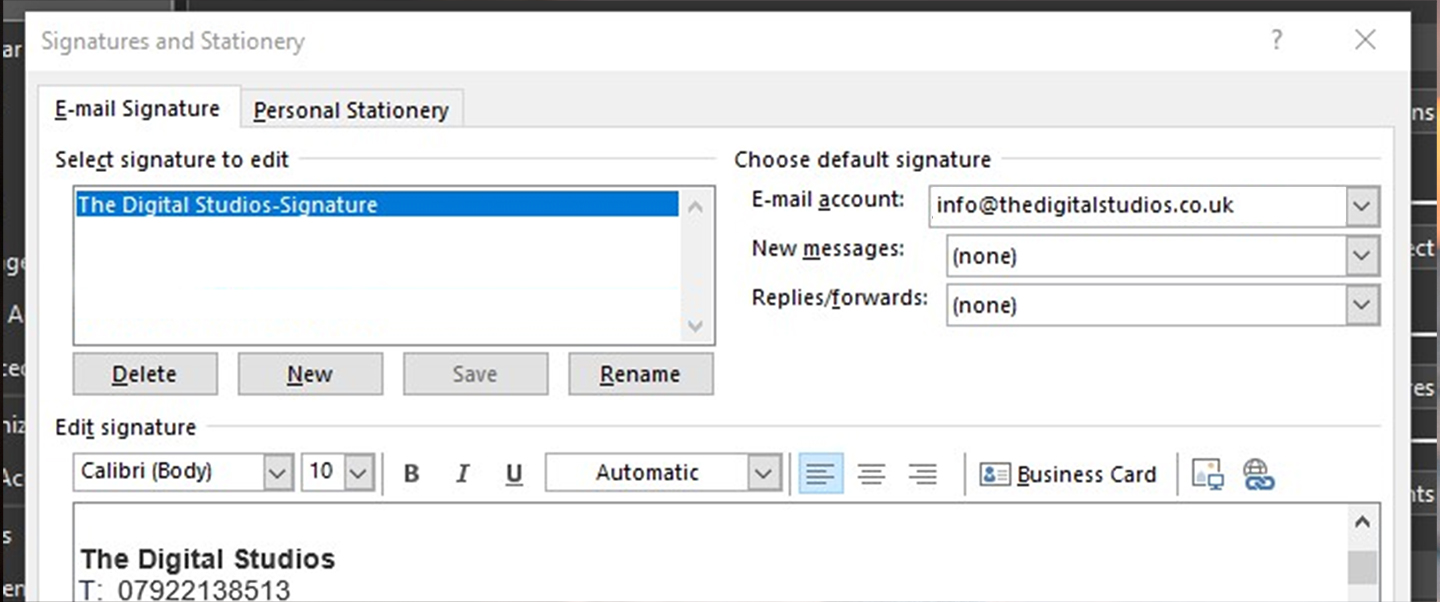
If you only have one signature you can set the signature to default to “New Messages” & “Replies / Forwards”
- Click on File, then Options, then Mail, then click on the Signatures button.
- You should see your new signature file in the list, in the “Select signatures to edit” box. The name of the signature will be the same as your HTML file name.
- To the right, you can choose from the options “New messages” and “Replies/forwards”.
- Click “OK” on “Signatures and “Outlook Options”.


